REGISTRATION STEP BY STEP
We hope this guide will help you complete your registration.
PART ONE: SELECTING MEMBERSHIP TYPE AND PAYMENT
The process is the same for all membership types.
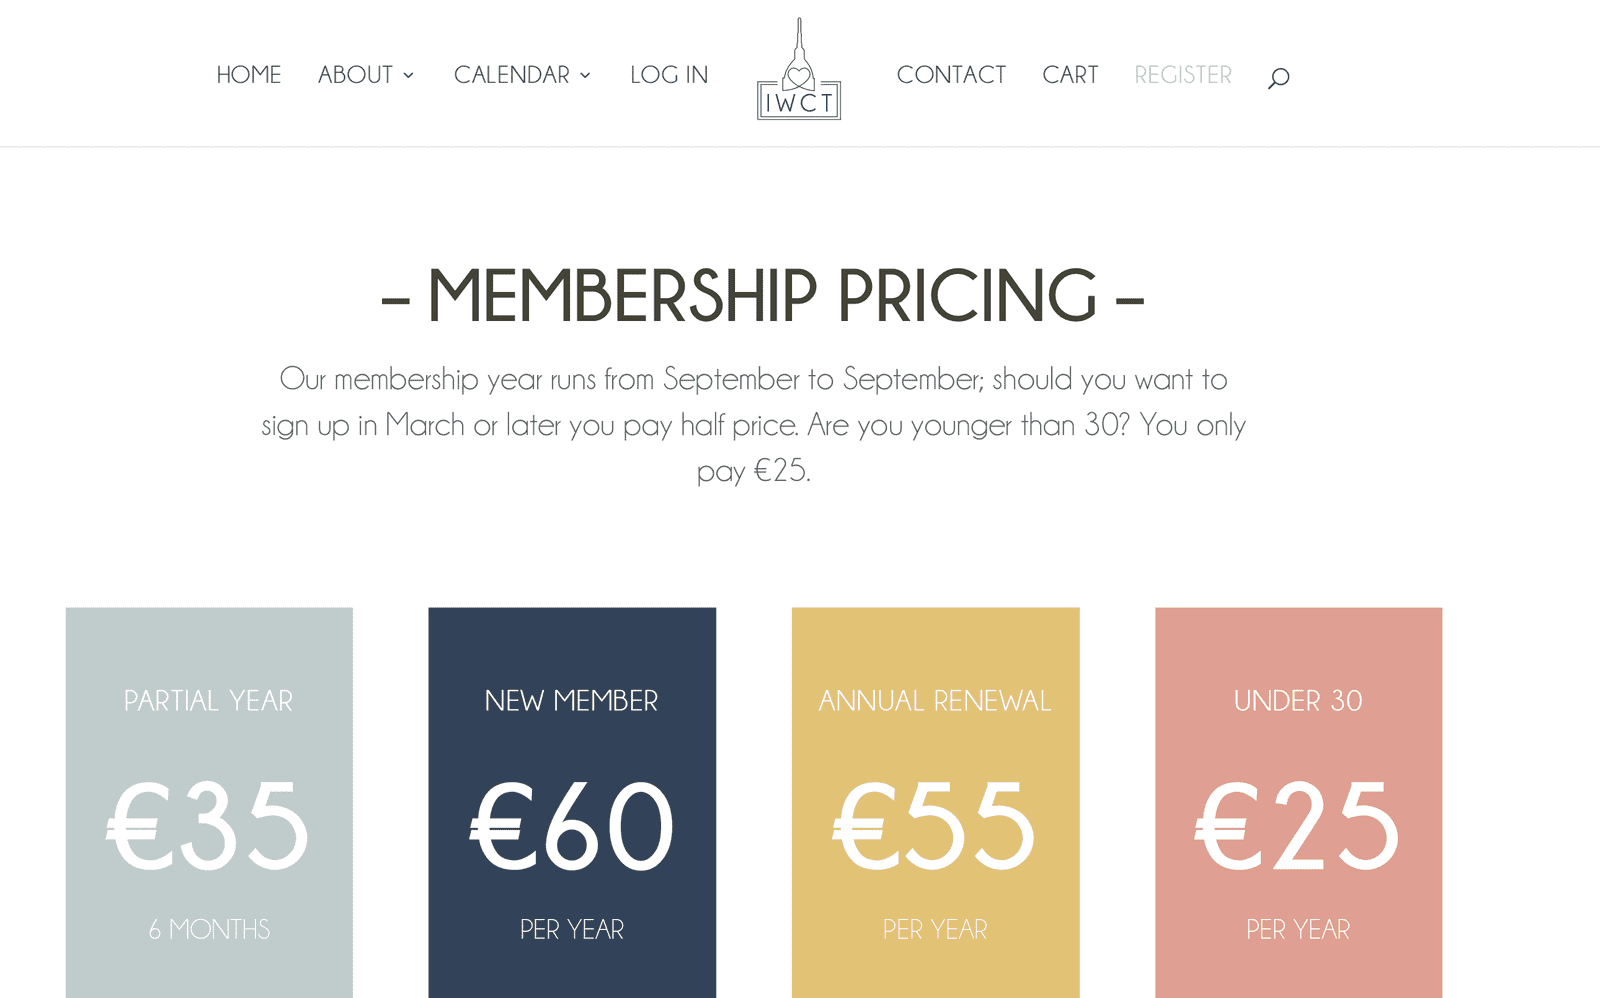
1. OPEN MEMBERSHIPS PAGE
Select the membership you want by clicking on the colored part. You can find this page HERE
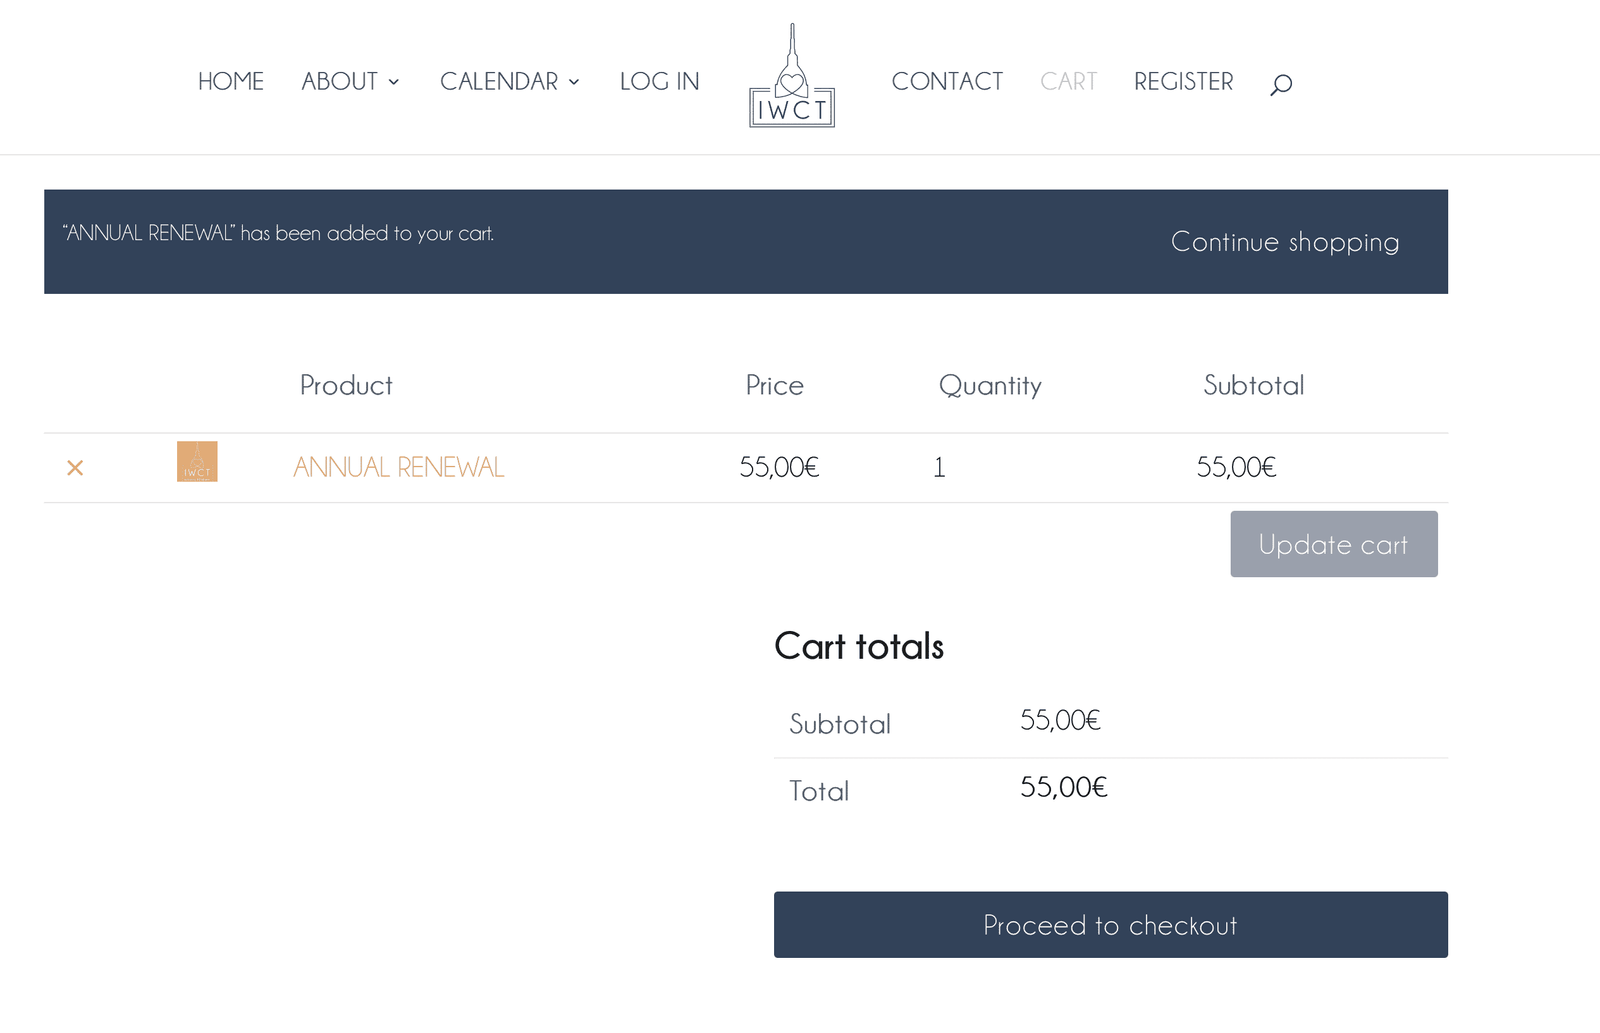
3. CHECK YOUR CART
On this page you have the ability to make sure you have chosen what you want. If you are happy with your choice: click on the “proceed to checkout” button. If you are not happy, click on the red X next to the product icon and return to step 1.
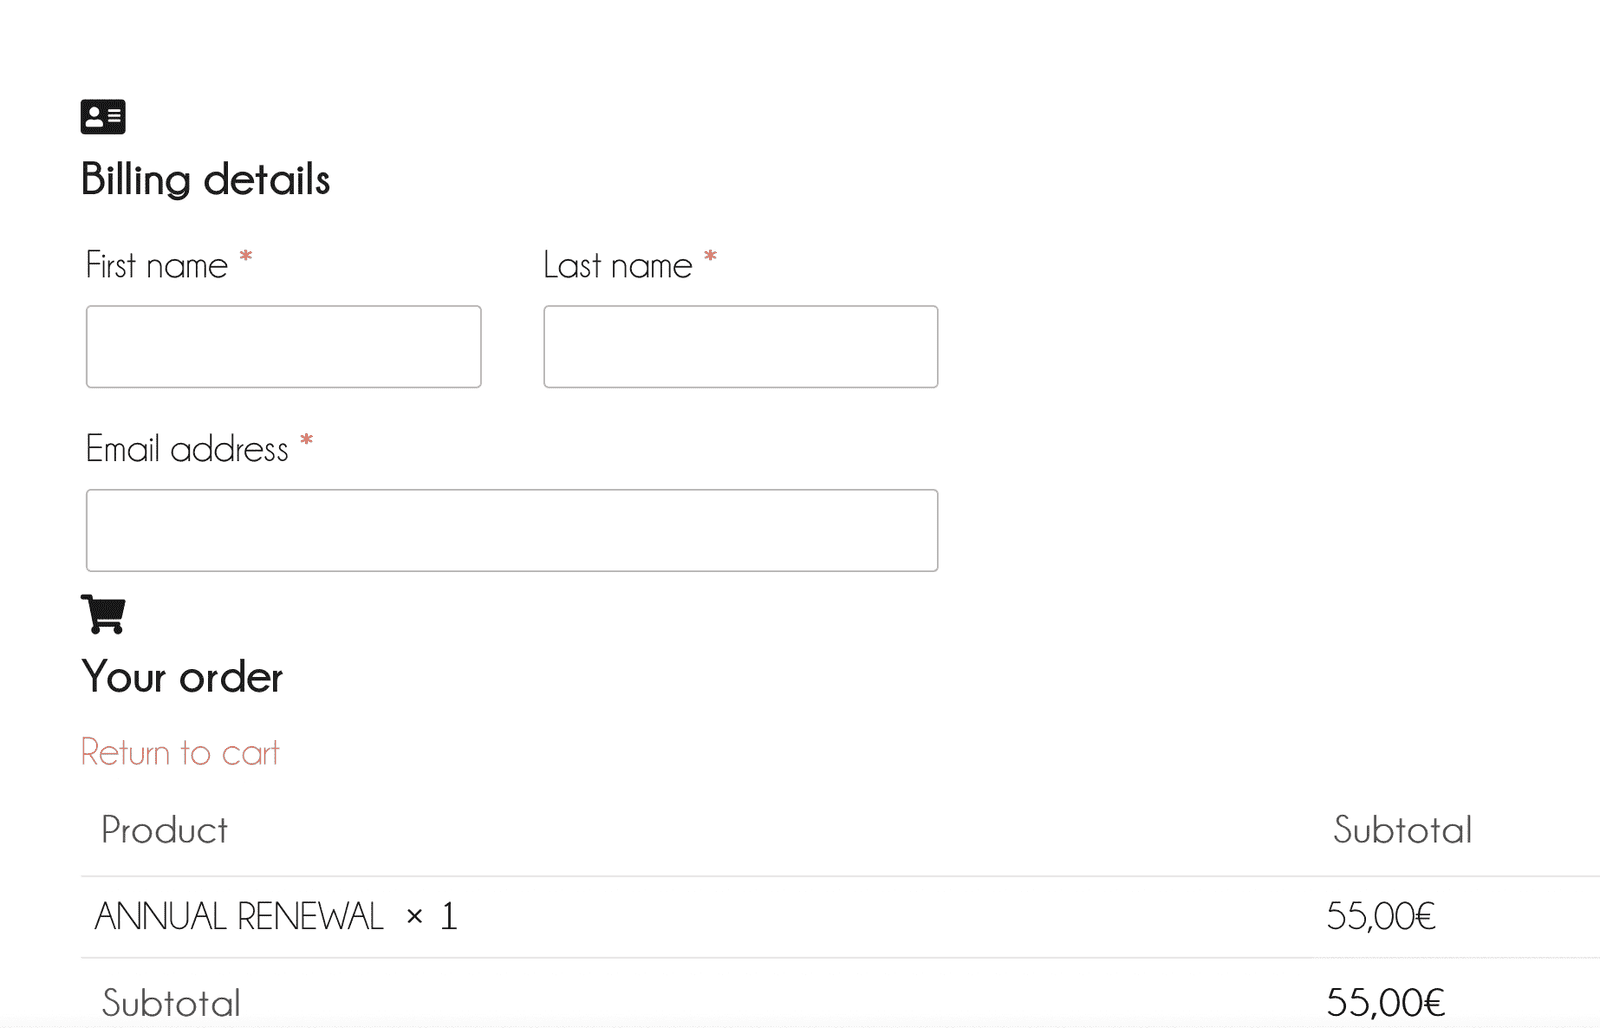
4. ENTER YOUR BILLING DETAILS
First name, last name and email address are all REQUIRED.
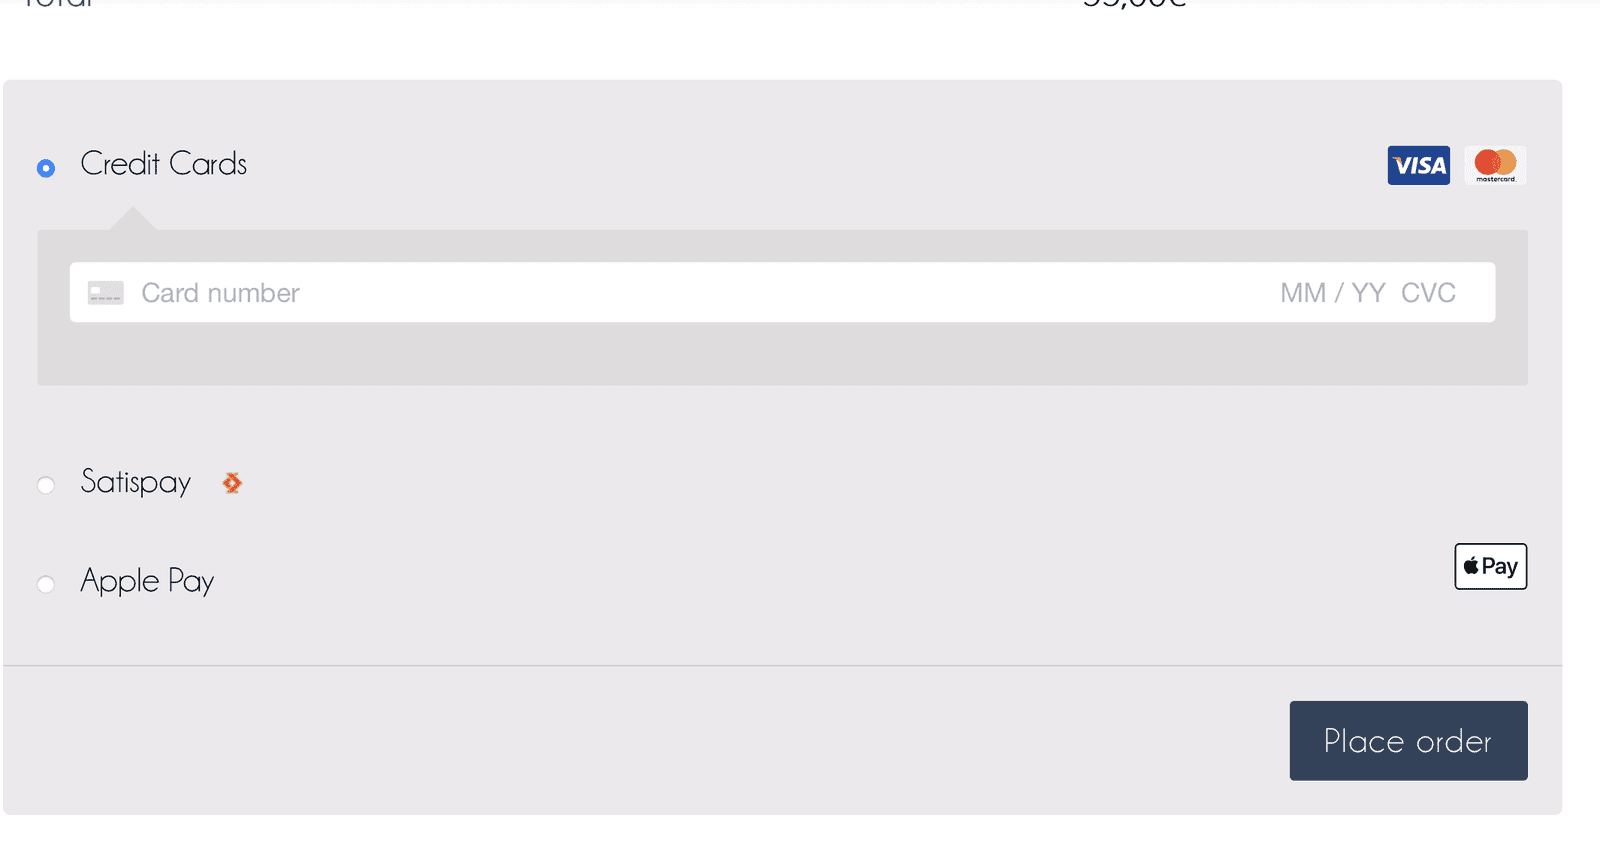
5. CHOOSE PAYMENT METHOD
Select what way you want to pay, enter the required information and hit the “Place order” button.
PART TWO: SETTING UP YOUR NEW PROFILE
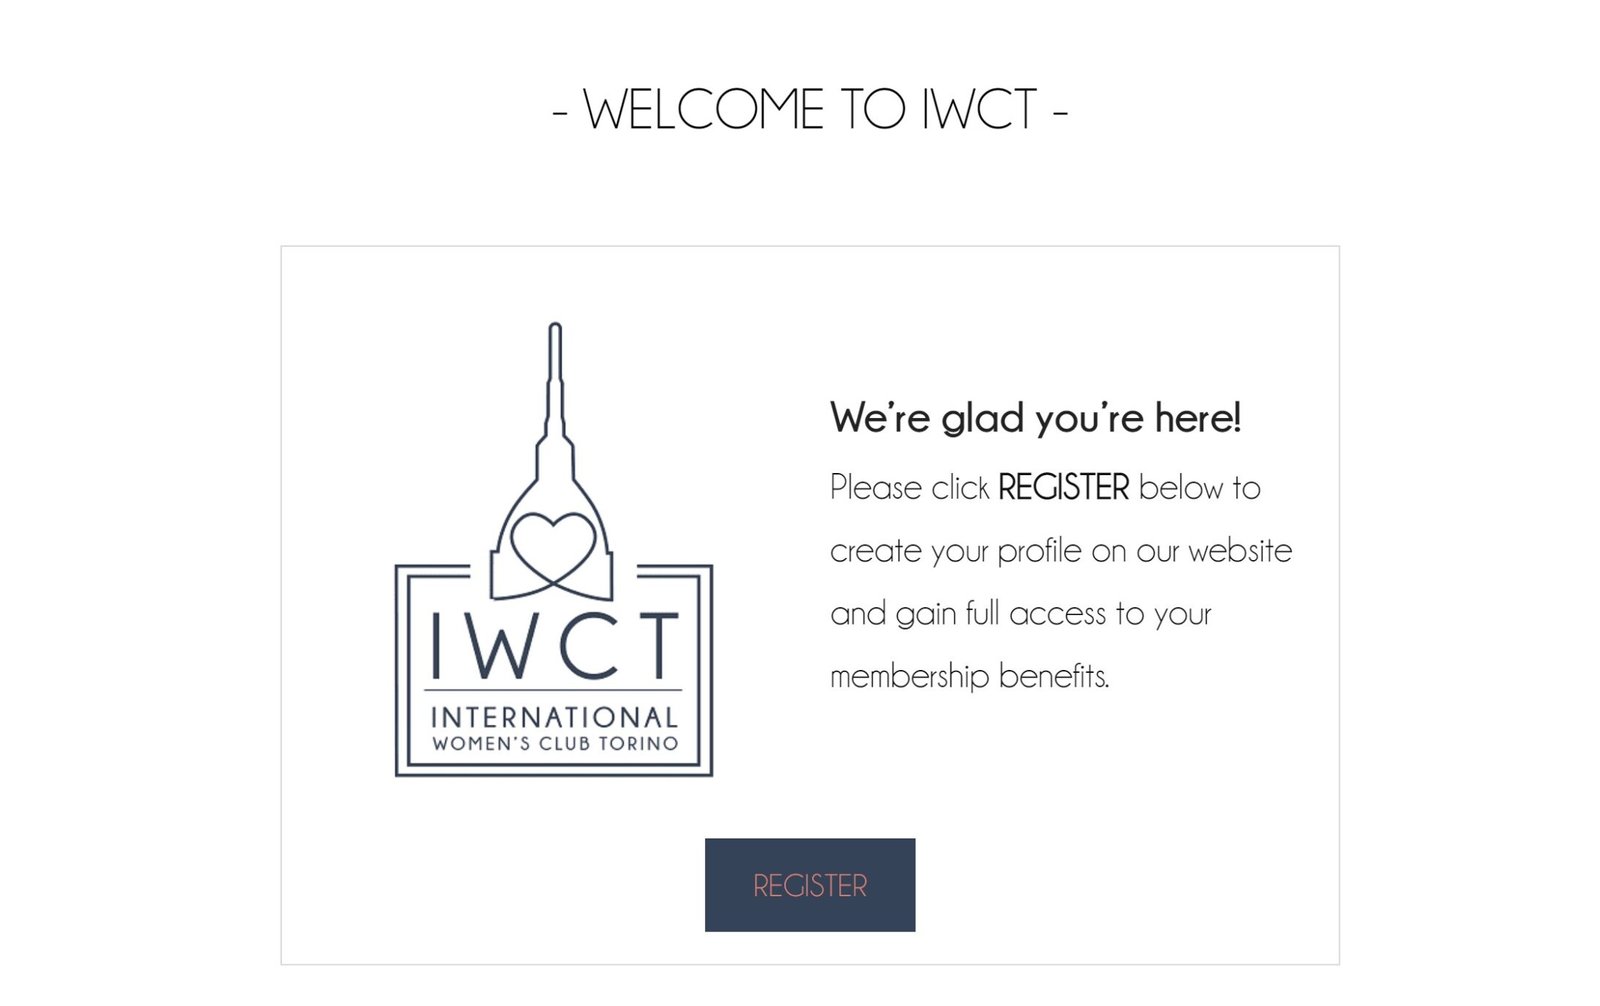
WELCOME
Upon successful payment you are automatically redirected to this window.
Please click the “create your profile” button.
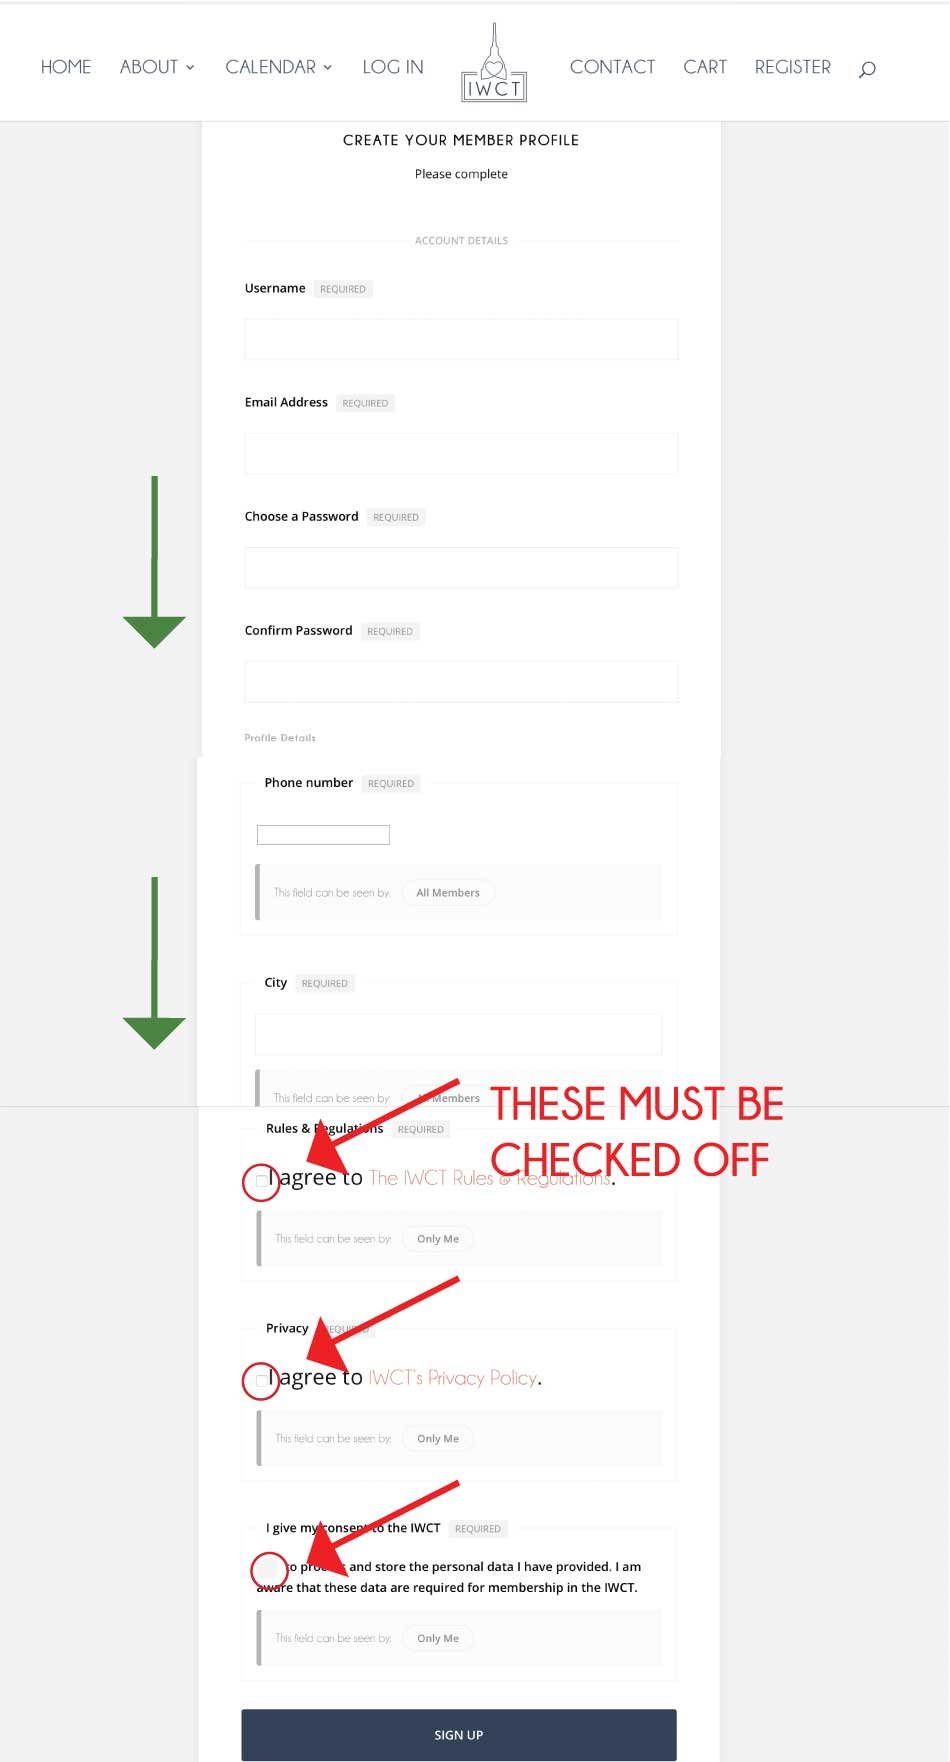
1. FILL IN PROFILE INFORMATION – PART ONE
1. Create a username, fill in your email address, choose a password and confirm that password.
2. SCROLL down to find the next part
.3. Fill in your phone number and the name of the city where you live.
4. SCROLL down to find the last part.
5. Check off the boxes for rules & regulations, privacy policy and data consent.
6. Click on the “sign up” button.
NB! If this information is not entered the form will not let you continue until it is done correctly.
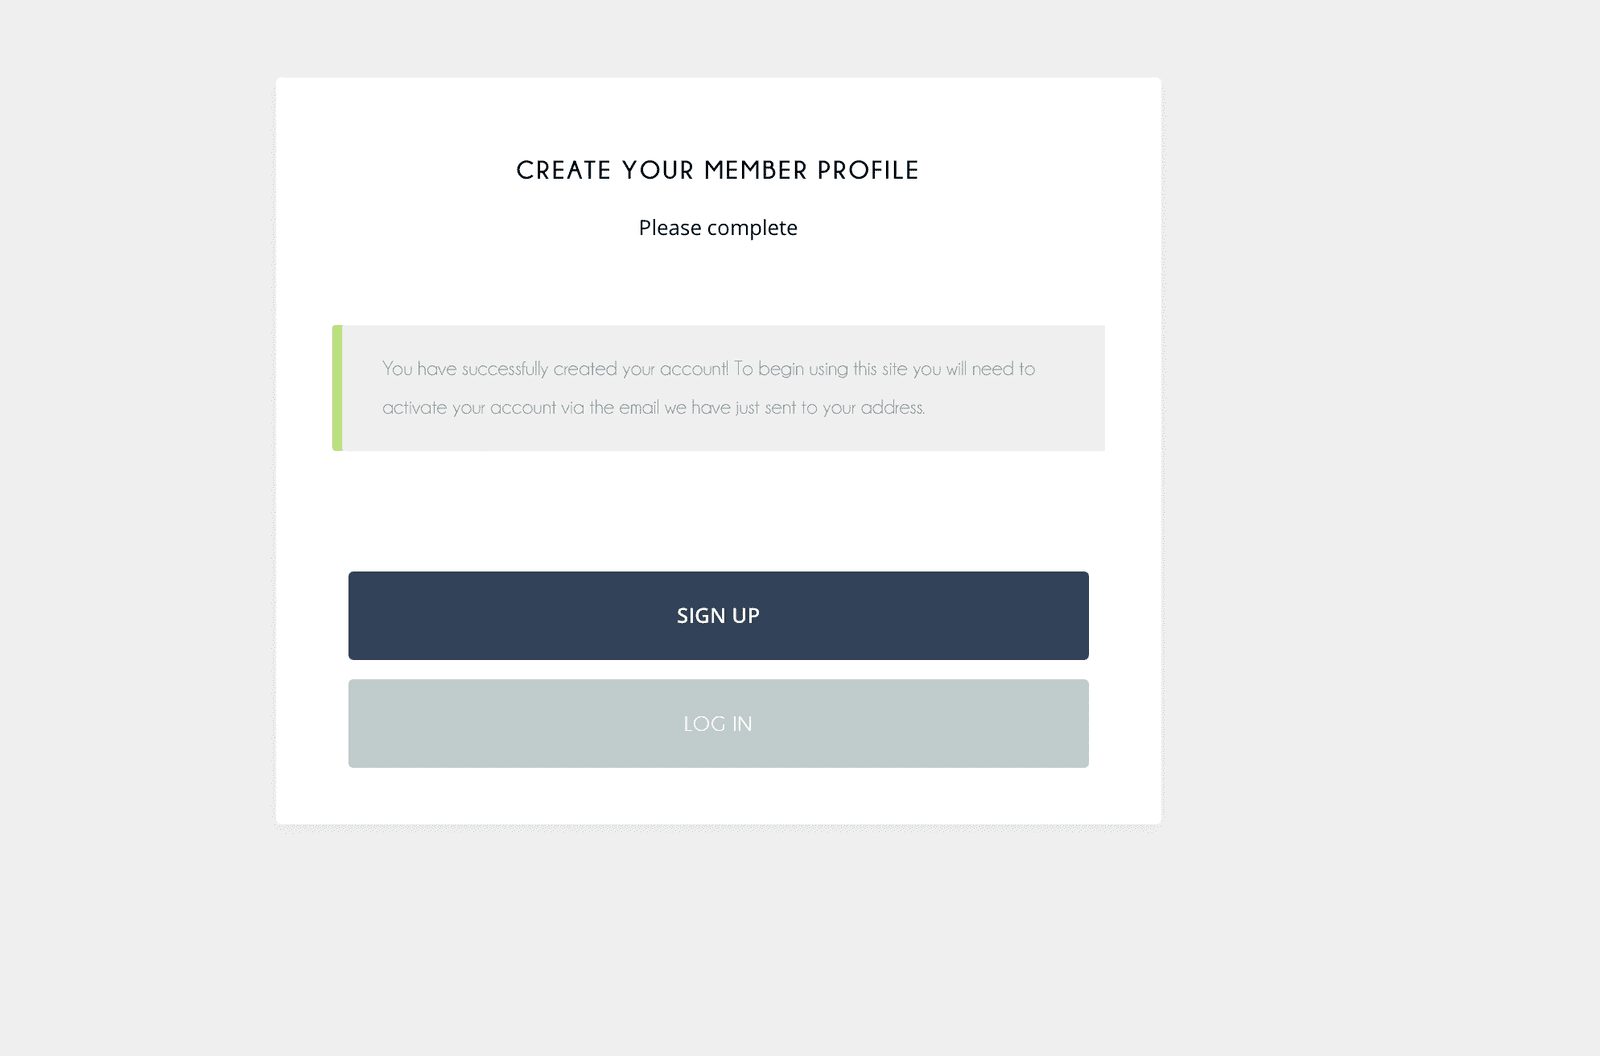
2. ACTIVATION – OPEN EMAIL
When you have entered the information correctly this is what you will see. Now you need to open the inbox of the email address you have entered.
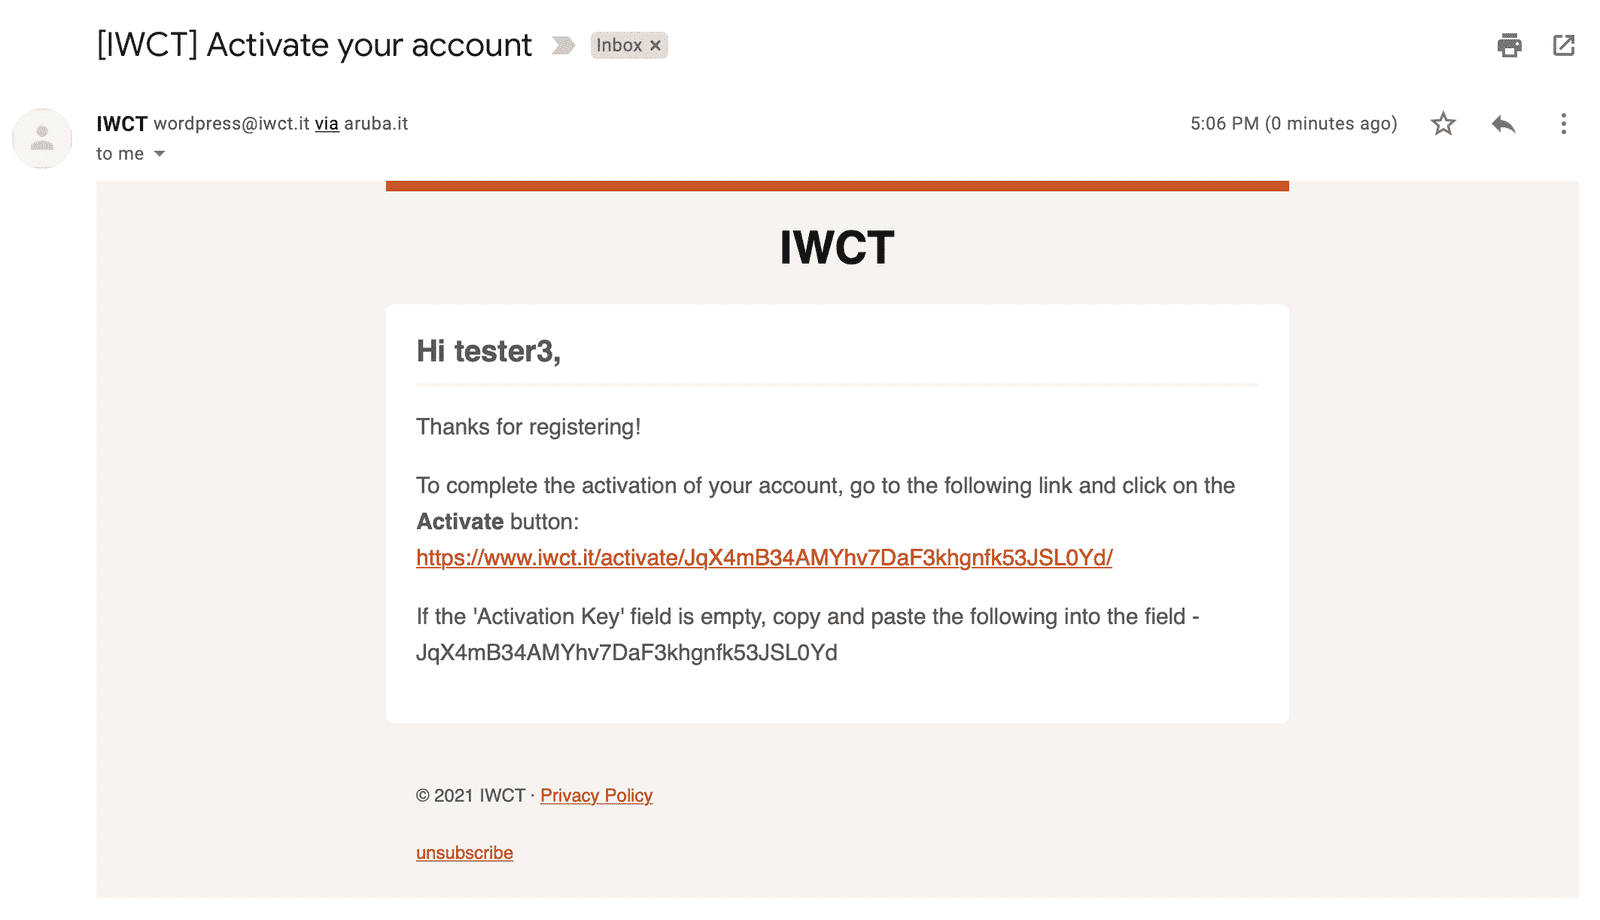
3. ACTIVATION – OPEN EMAIL
In your inbox (or spam) you will find an email from IWCT with the title “Activate your account.”

3. ACTIVATION – EMAIL
Click on the long red activation link.
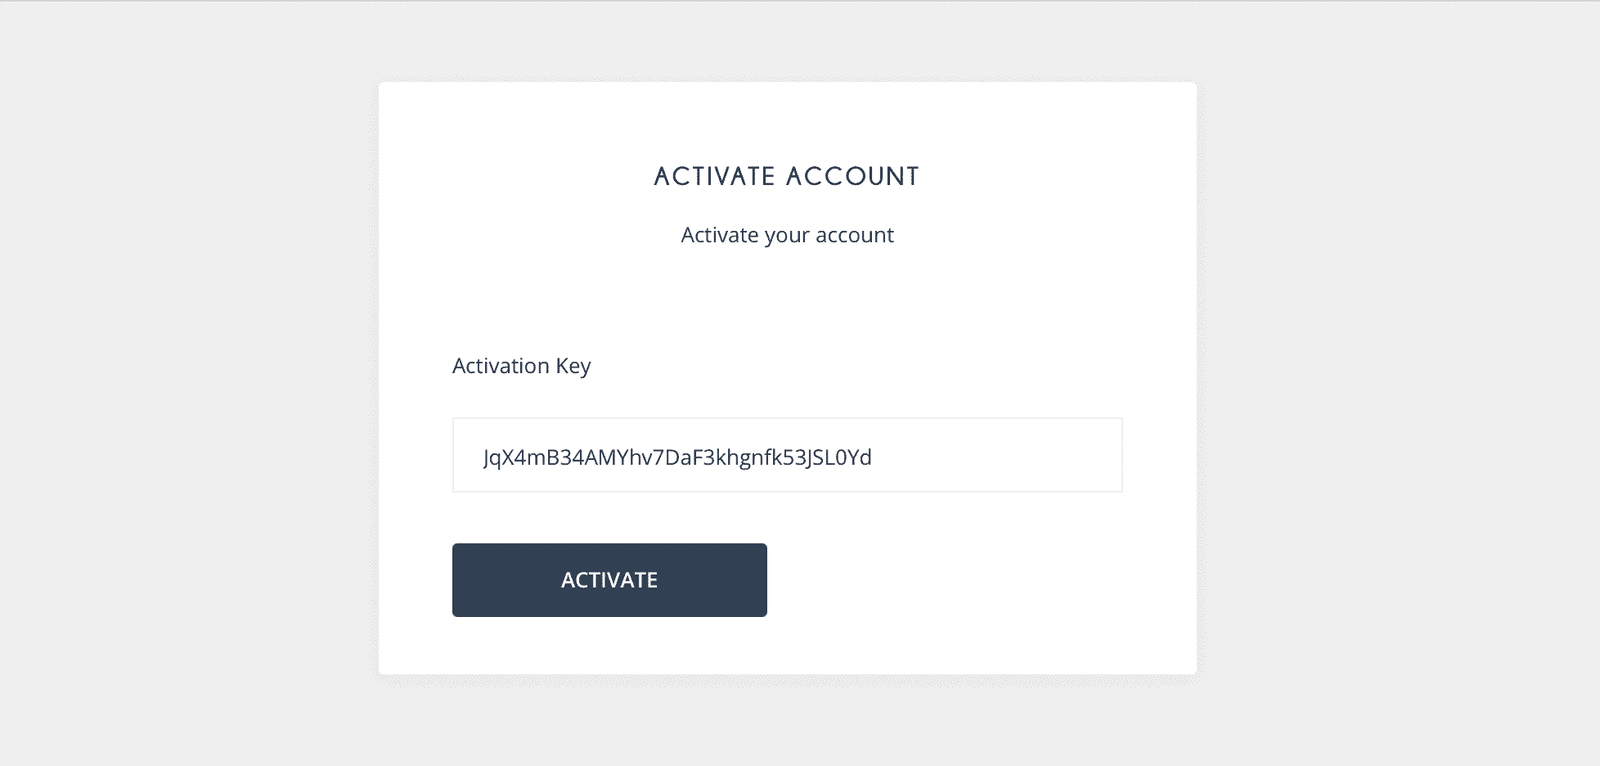
4. ACTIVATION
The link from your email will take you to a page that looks like this. Click on the blue “activate” button.
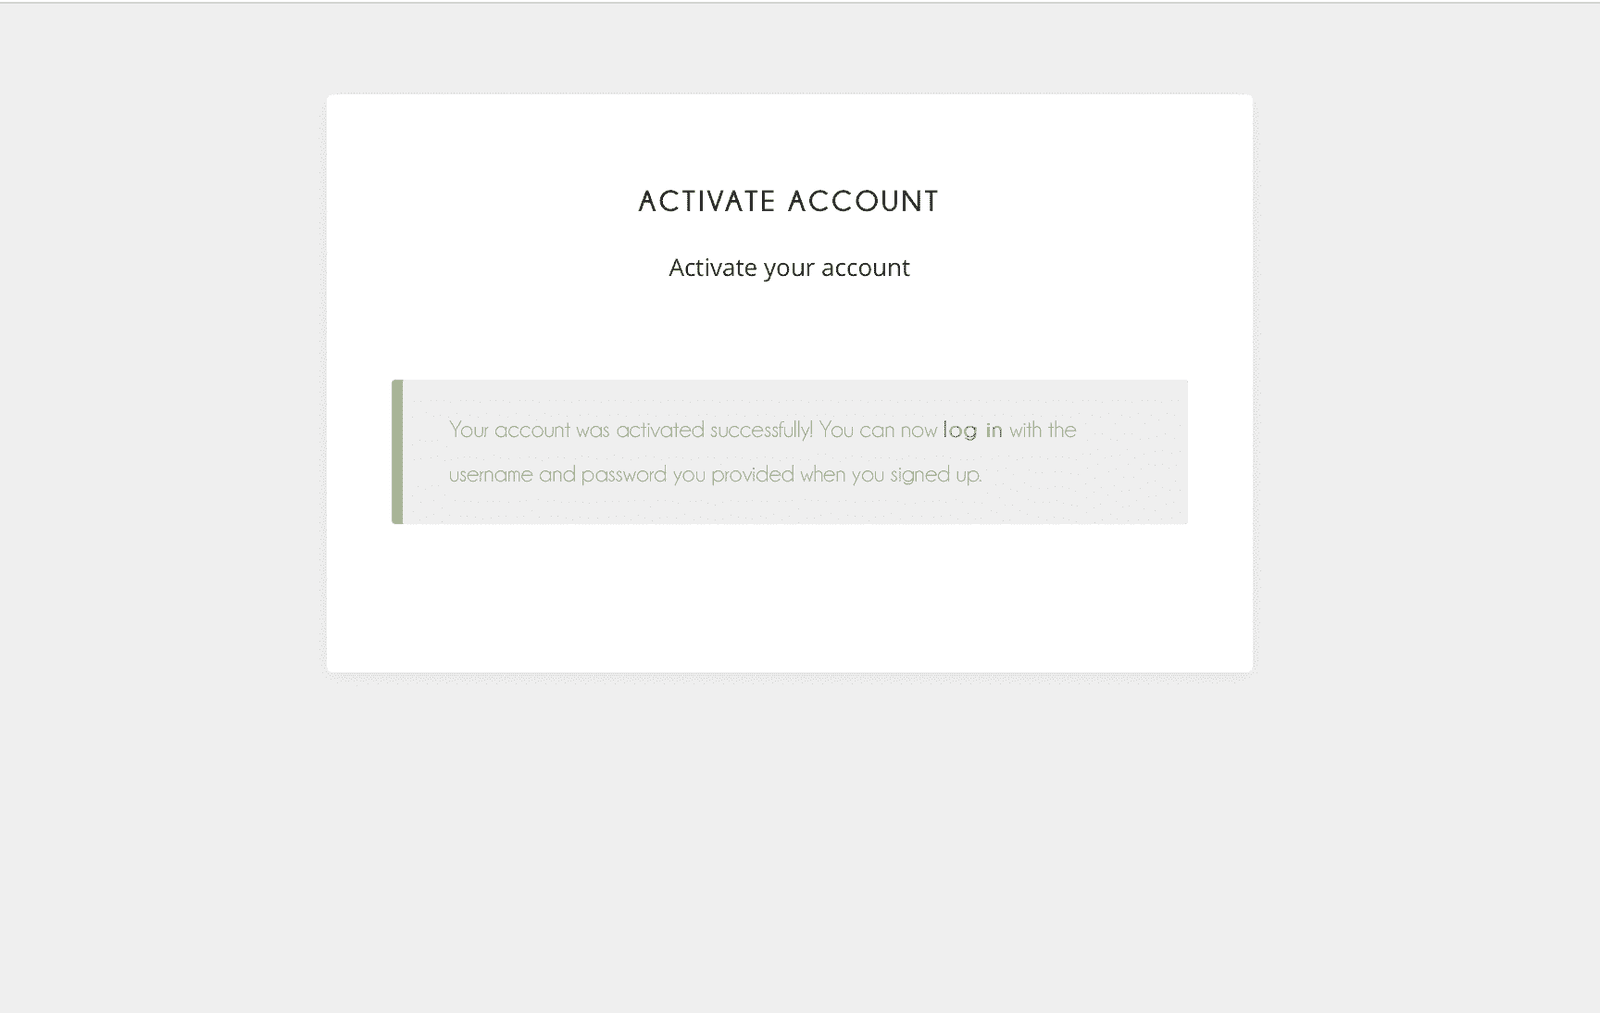
5. ACTIVATION IS LIVE
We have now verified your email address and you can log in to complete the next steps. Your account will NOT be fully active until you do so.
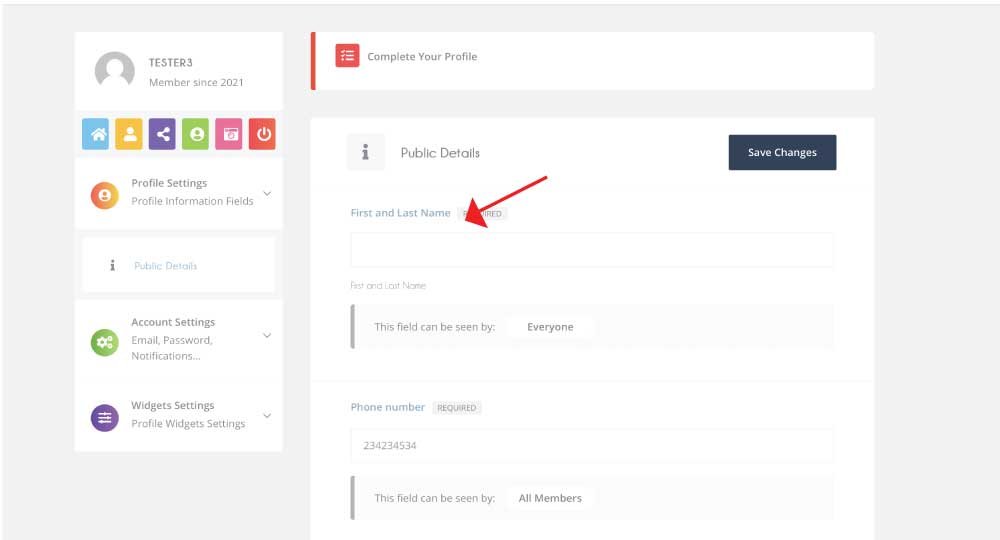
6. FILL IN PROFILE INFORMATION – PART TWO
On the Profile Settings page: Enter your first and last name where the arrow indicates. Hit the “save changes” button.
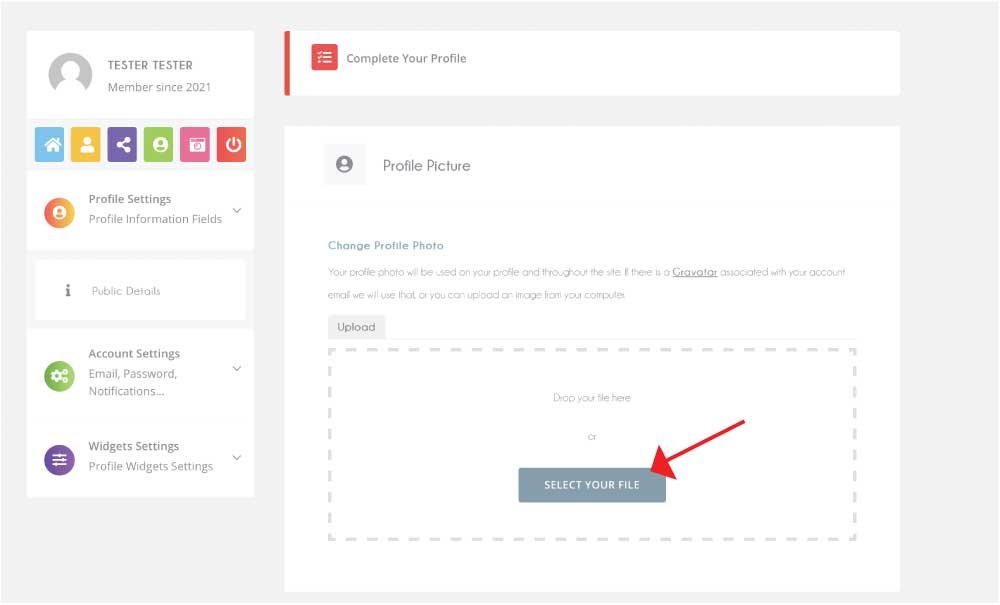
7. ADD A PROFILE PHOTO
Click on “select your file.”
8. CHOOSE PHOTO
Select a photo of yourself, it’s really nice if it is of YOU, so that others can recognize you even if they haven’t met you yet.
Click “choose for upload” or “open.”

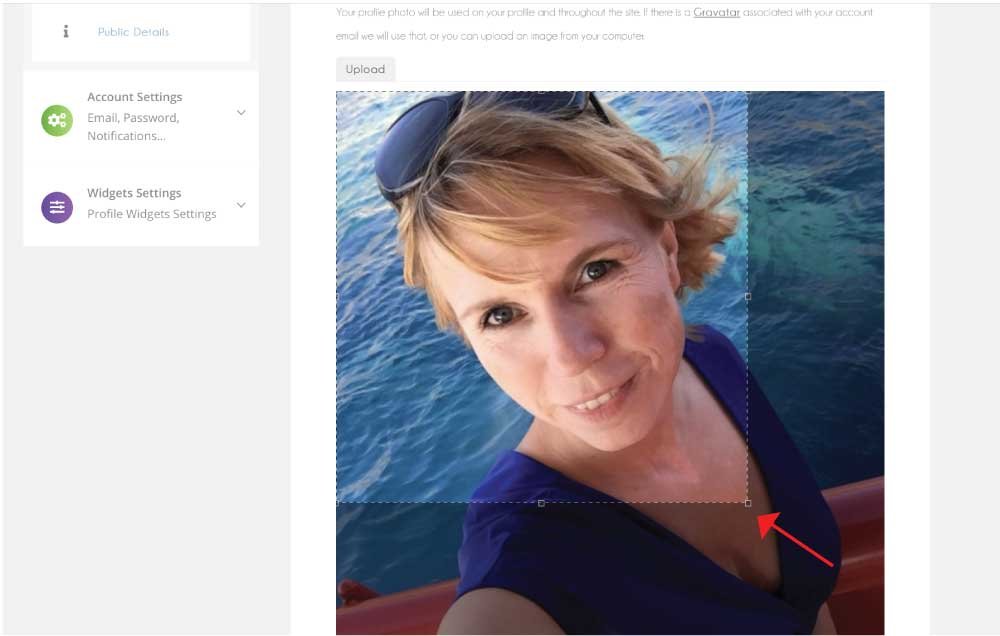
9. CROP YOUR PROFILE PHOTO
Drag the “corners” of the smaller frame to choose what part of the image should show. Now you need to scroll down.
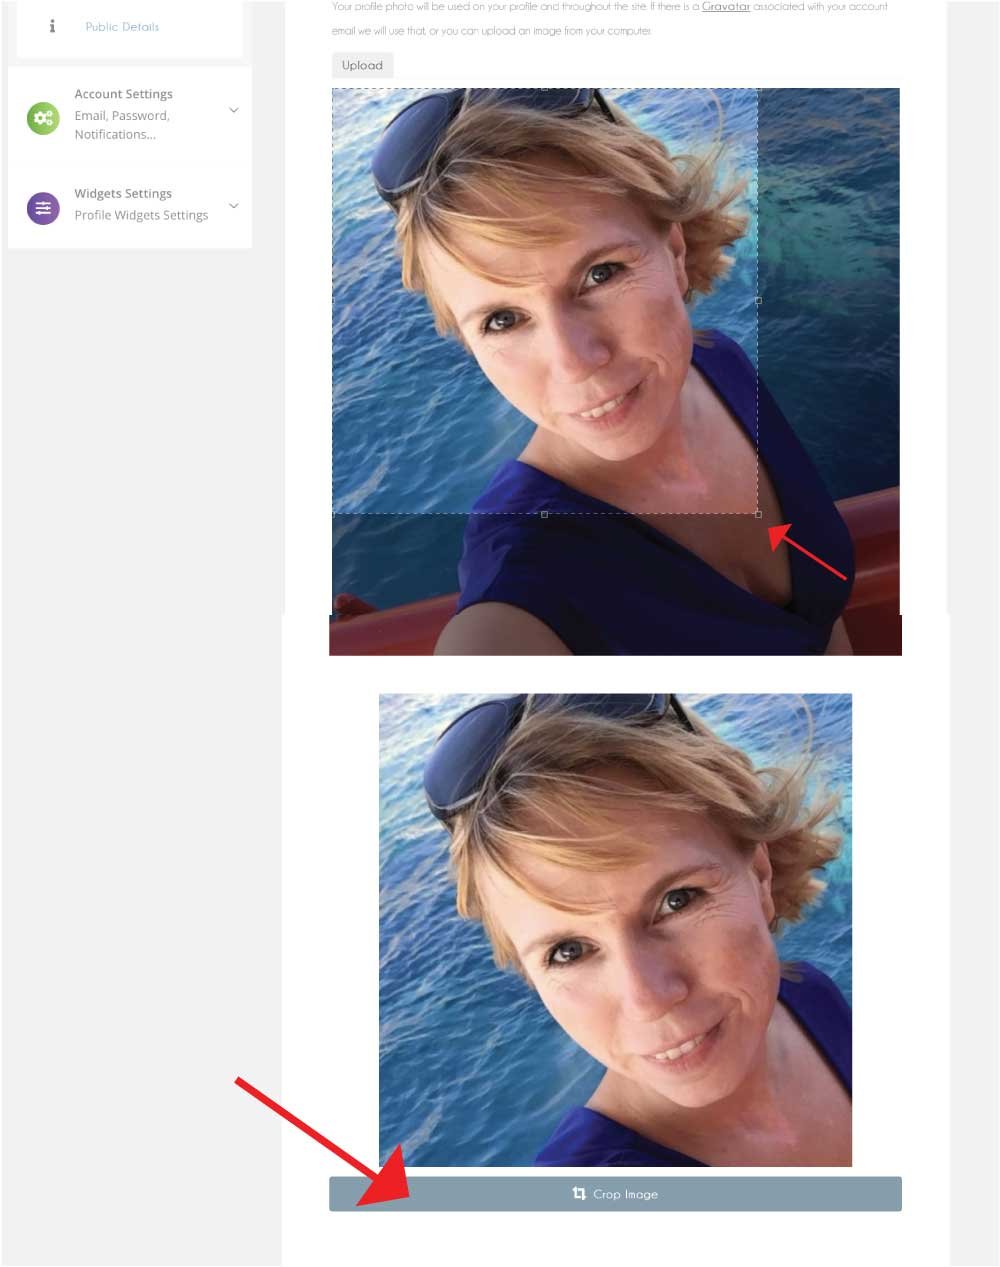
10. VERIFY PROFILE PHOTO
Scroll down to find the “crop image” button and click it.
You will see a green bar telling you that your upload was successful. Now you have uploaded a profile photo.
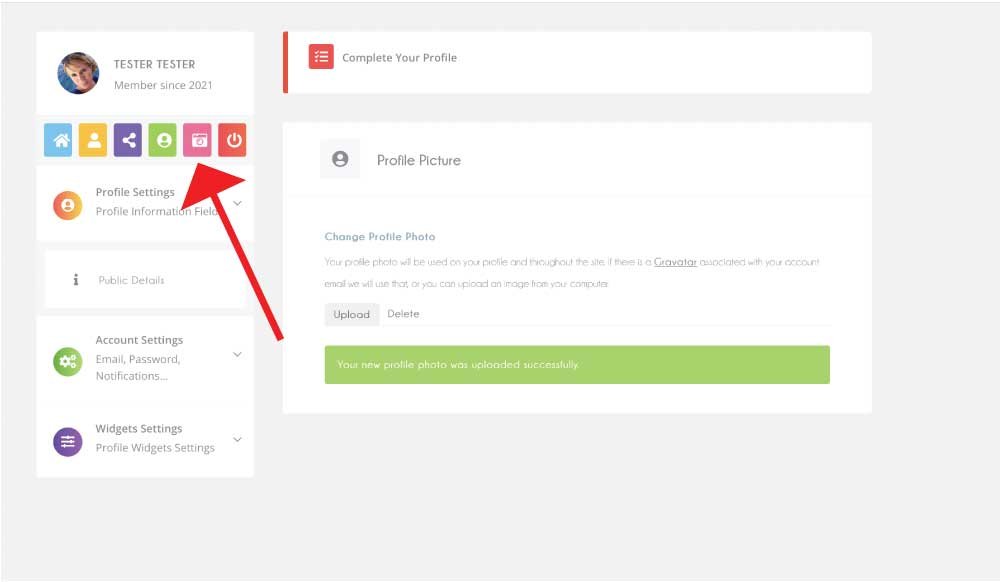
11. SET A COVER PHOTO
Click the pink button with a camera icon.
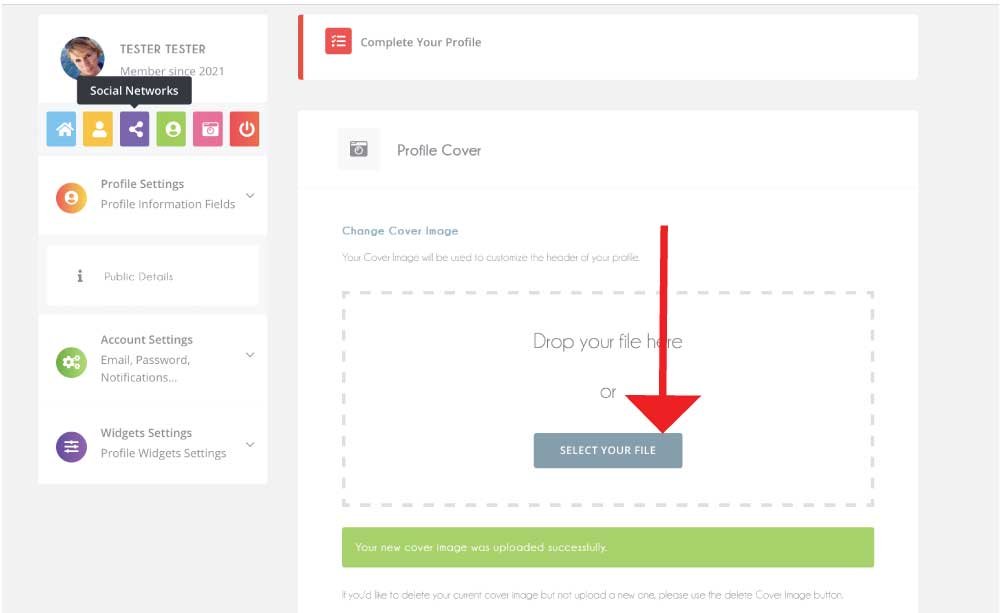
12. SET A COVER PHOTO
Click “select your file.”
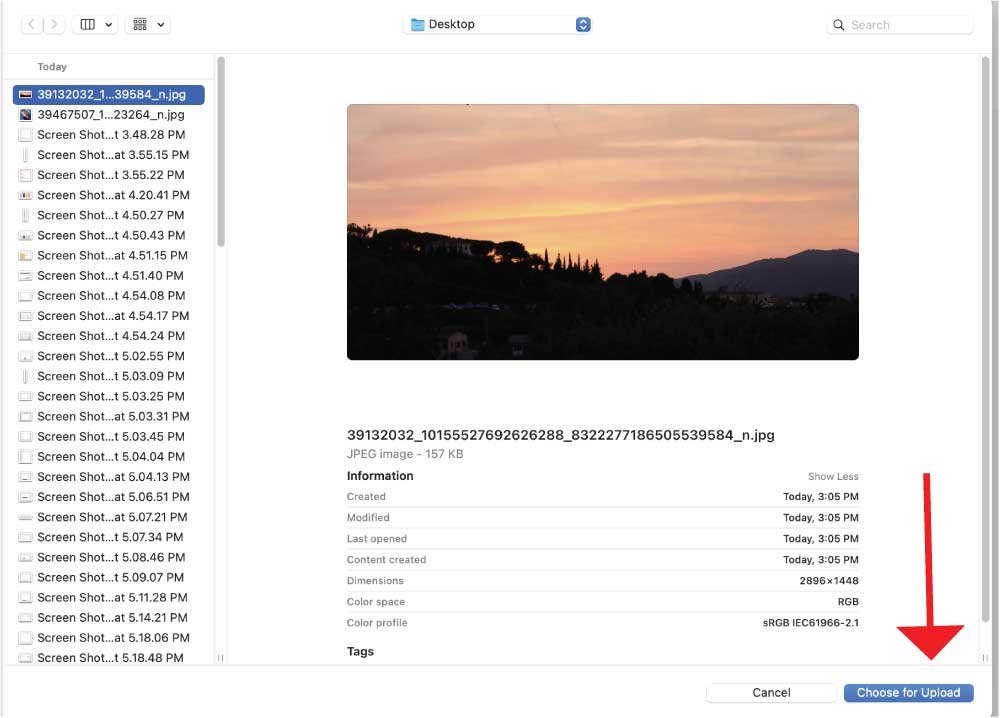
13. CHOOSE YOUR IMAGE
Click “choose for upload” or “open.”
The recommended size for cover photos is at least 1350px wide and 350px tall.
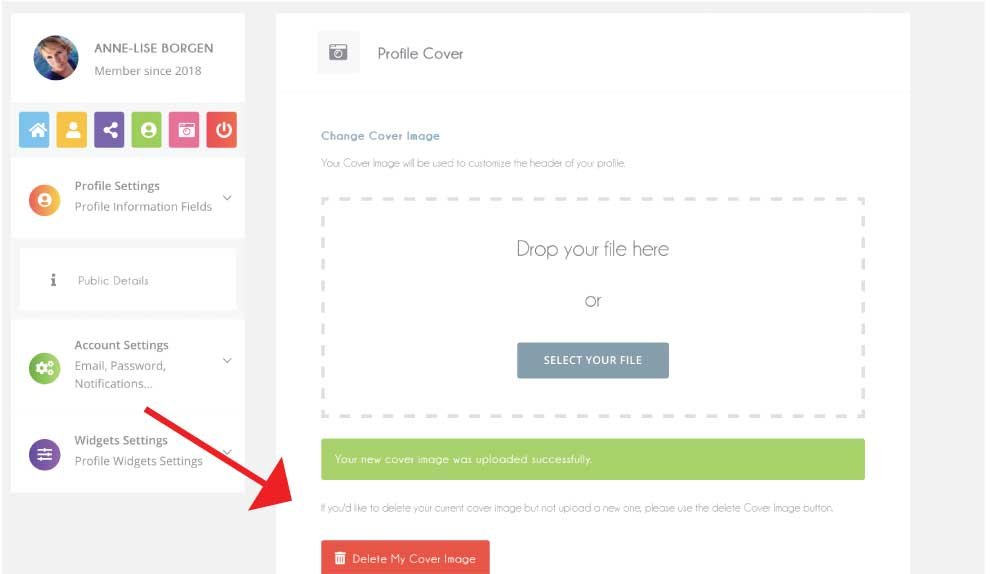
14. COVER PHOTO IS SET
When you see both the red button and the green bar, your cover photo has been successfully set.
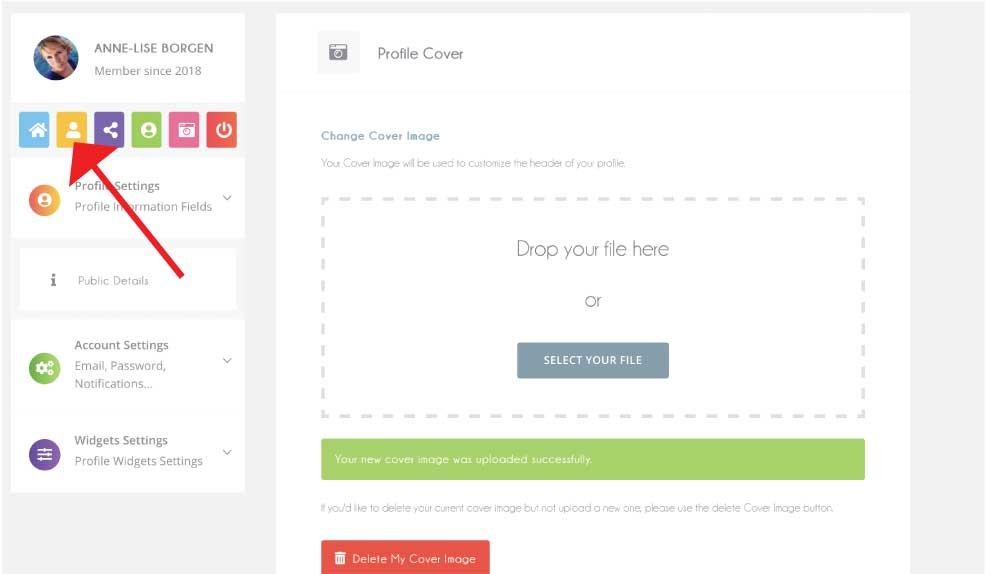
15. TAKE A LOOK AT YOUR PROFILE
Click on the yellow button.
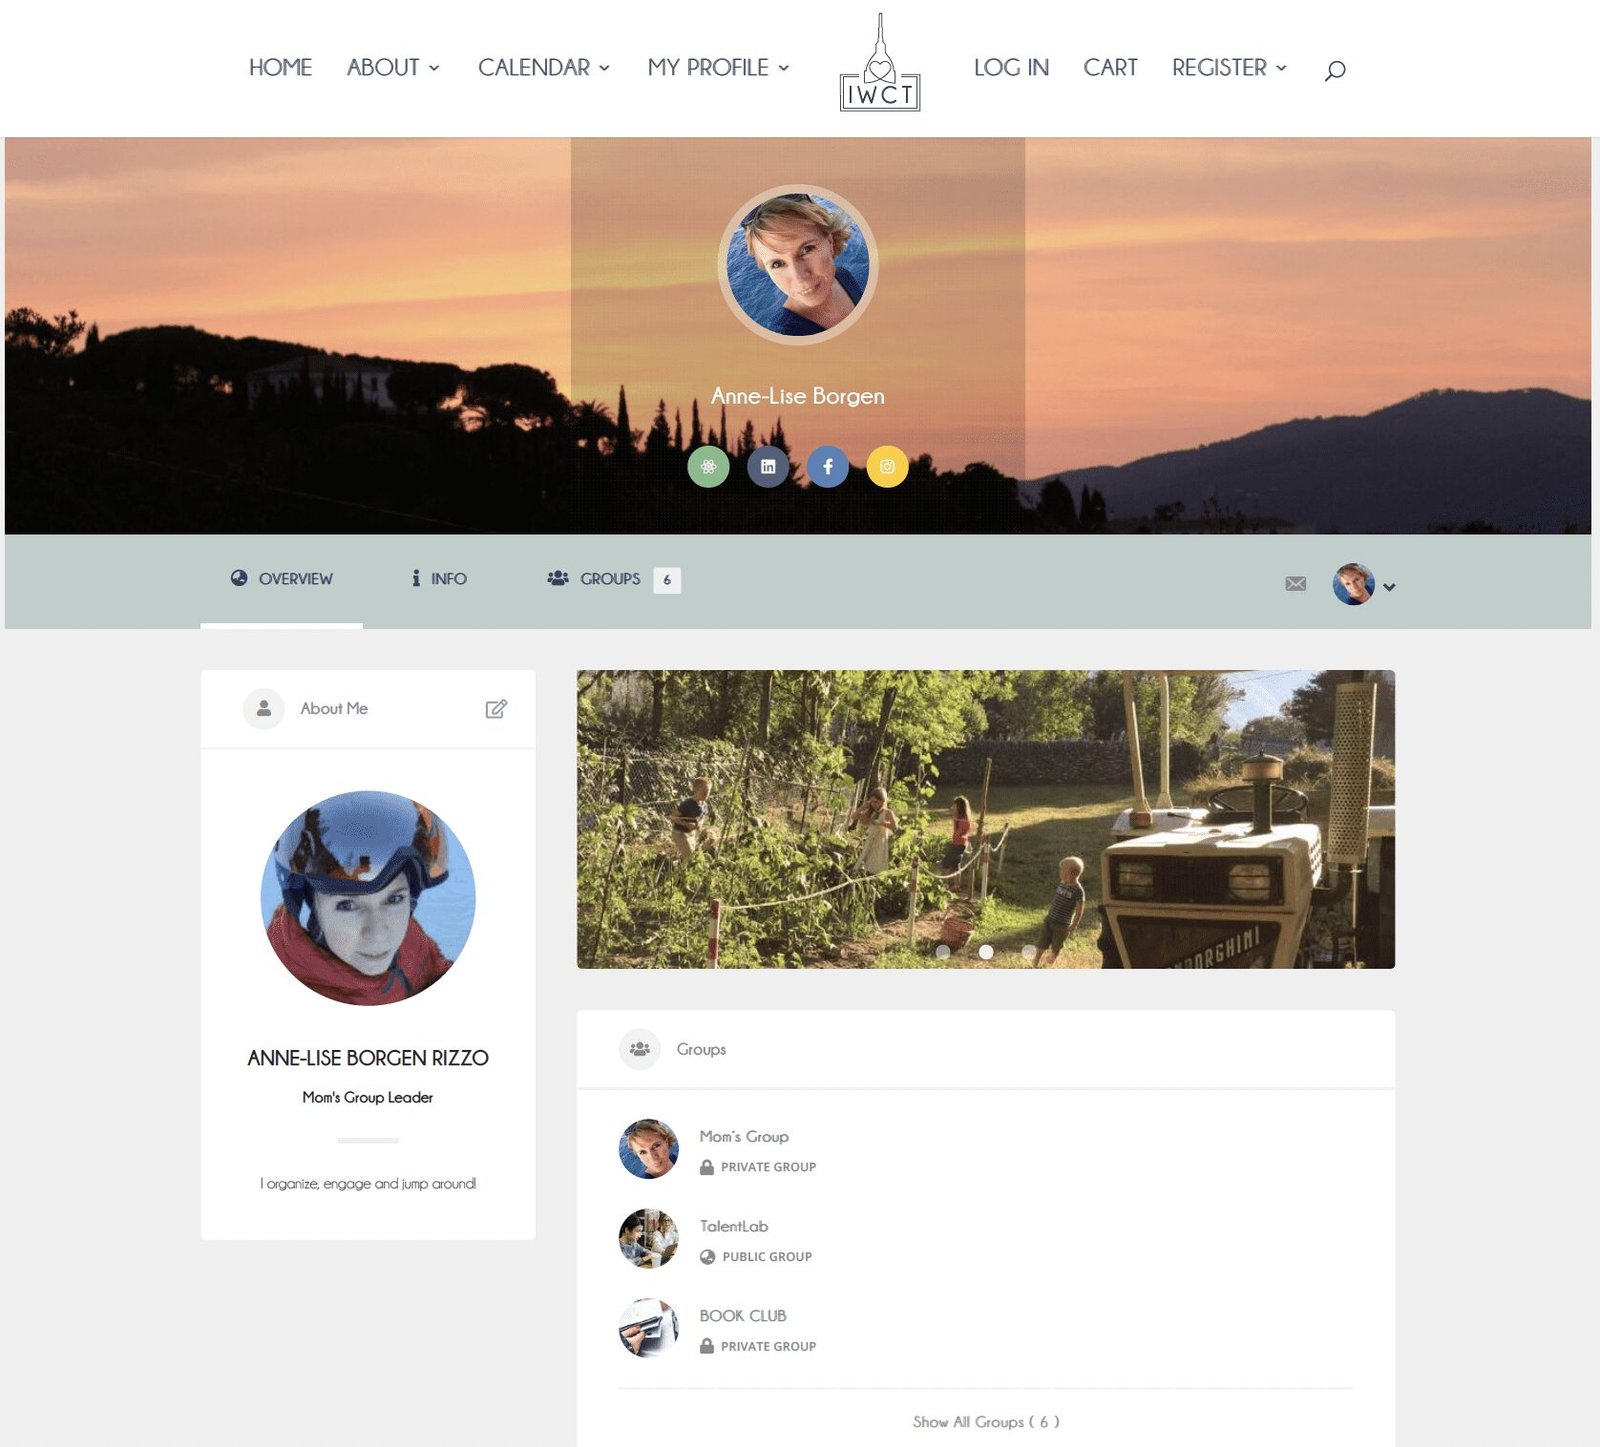
16. THIS IS WHAT OTHERS WILL SEE
With your info of course 🙂

MAKING YOUR PROFILE REALLY NICE!
THIS PART IS NOT MANDATORY
With a new website we have the possibility to share our social networks (Facebook etc), photos and a little bio that other members can see in our profile. ONLY MEMBERS who ARE LOGGED IN will be able to see your information and your profile.
1. SOCIAL MEDIA BUTTONS
For if you want other members to find you on Instagram, Facebook, Linkedin or to see your website. You do not need all four to set them up. Just add the ones you want to show.
2. ABOUT ME SECTION
Here you can share some more about yourself, work, family, hobbies write a little bio to share.
3. PHOTO GALLERY
You can share up to three photos that you like 🙂
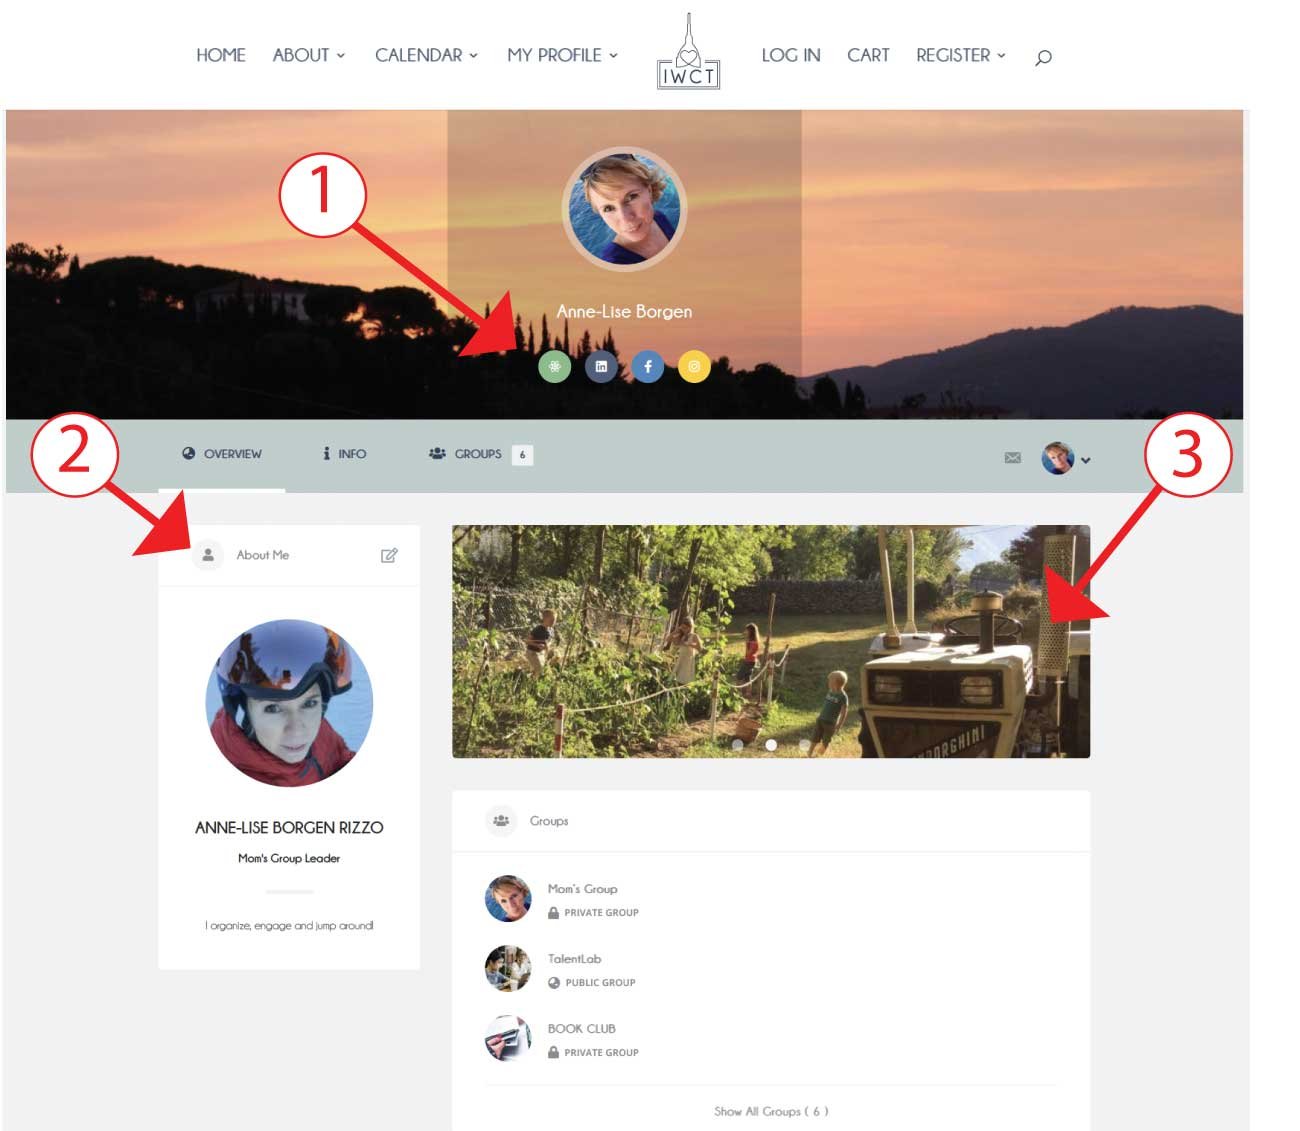
FIND YOUR STEP BY STEP TUTORIAL TO EACH OF THESE MODULES HERE
SOCIAL MEDIA SETUP
Make sure to connect also outside of the website.
ABOUT ME SETUP
Let others know a little bit more about you, what do you like?
PHOTO GALLERY SETUP
Share some good memories, perhaps from a club event!
